Are you concerned about the potential security vulnerabilities in your system’s boot process? Look no further, as we explore the critical issue of secure boot being enabled when the system is in user mode. Discover the impact of this problem and learn about effective solutions in this article.
What Is Secure Boot?
Secure Boot is a security feature that is implemented in modern computer systems to guarantee that only trusted software is loaded during the boot process. Its purpose is to prevent the loading of unauthorized operating systems, bootloaders, or drivers that may contain malware or unauthorized modifications. Secure Boot operates by verifying the digital signatures of the software components before allowing them to be executed. This ensures that the system will only run software that has been signed with trusted keys. By utilizing Secure Boot, users can effectively safeguard their systems from potential security threats and maintain the integrity of their operating systems.
Why Is Secure Boot Important?
Secure Boot is a crucial feature that plays a vital role in safeguarding the integrity and security of a computer system. Its main function is to ensure that only trusted software, including operating systems and drivers, is permitted to run during the boot process. This effectively prevents any malware or unauthorized software from infiltrating the system. By verifying the digital signatures of these software components, Secure Boot serves as a powerful defense against rootkits and other types of malicious software. It is a key factor in reducing the risk of system compromise and maintaining a secure computing environment.
What Is User Mode?
User mode is a privilege level in computer systems that restricts applications from directly accessing system resources or executing privileged instructions. This ensures the stability and security of the operating system by preventing unauthorized access or modifications. User mode is essential for developers and system administrators to understand to maintain the proper functioning and security of computer systems. It is in contrast with kernel mode, where the operating system and device drivers have direct access to hardware and can perform privileged operations.
What Happens When Secure Boot Is Enabled?
Secure Boot is a security feature that has become standard on most modern computers. When enabled, it helps protect the system from malware and ensures that only trusted operating systems can boot. But what exactly happens when Secure Boot is enabled? In this section, we will discuss the three main aspects of Secure Boot: only allowing signed operating systems to boot, protection against malware and rootkits, and managing Secure Boot keys. By understanding these key components, we can better appreciate the importance of enabling Secure Boot on our systems.
1. Only Signed Operating Systems Can Boot
When Secure Boot is enabled, only operating systems that are signed can boot, protecting against malware, rootkits, and unauthorized system modifications. To address the sub-topic of “Only Signed Operating Systems Can Boot,” here are steps to enable Secure Boot:
- Access BIOS settings by restarting your computer and pressing the designated key (e.g., F2, Del) during the startup process.
- Locate the Secure Boot option in the BIOS settings menu.
- Enable Secure Boot by selecting the option and saving the changes.
- Restart your computer for the changes to take effect.
- Ensure that the operating system and its associated drivers are digitally signed with a valid certificate.
By following these steps, you can enforce the booting of only signed operating systems, enhancing the security of your system.
2. Protection Against Malware and Rootkits
- Secure Boot protects against malware and rootkits by ensuring that only signed operating systems can boot.
- Signing ensures that the software comes from a trusted source and hasn’t been tampered with.
- To enable Secure Boot, access the BIOS settings and enable the Secure Boot feature.
- If Secure Boot is accidentally enabled in user mode, follow these steps to fix it:
- Check the BIOS settings to ensure Secure Boot is disabled.
- Update the BIOS to the latest version to fix any bugs or vulnerabilities.
- Disable Secure Boot if it’s still enabled.
- Run anti-malware scans to ensure the system is clean.
- If necessary, reinstall the operating system to fix any issues with Secure Boot being enabled in user mode.
3. Secure Boot Key Management
Effective management of Secure Boot keys is crucial for maintaining the security and integrity of a system. Here are the necessary steps to ensure proper management of Secure Boot keys:
- Generate Secure Boot keys using a trusted key management tool.
- Safely store the keys to prevent any unauthorized access.
- Regularly update and rotate the keys to enhance security.
- Restrict access to the keys to only authorized individuals.
- Monitor and log the usage of keys for audit purposes.
- Periodically review and verify the authenticity of the keys.
By adhering to these steps, organizations can effectively manage their Secure Boot keys and safeguard their systems from any unauthorized access or tampering.
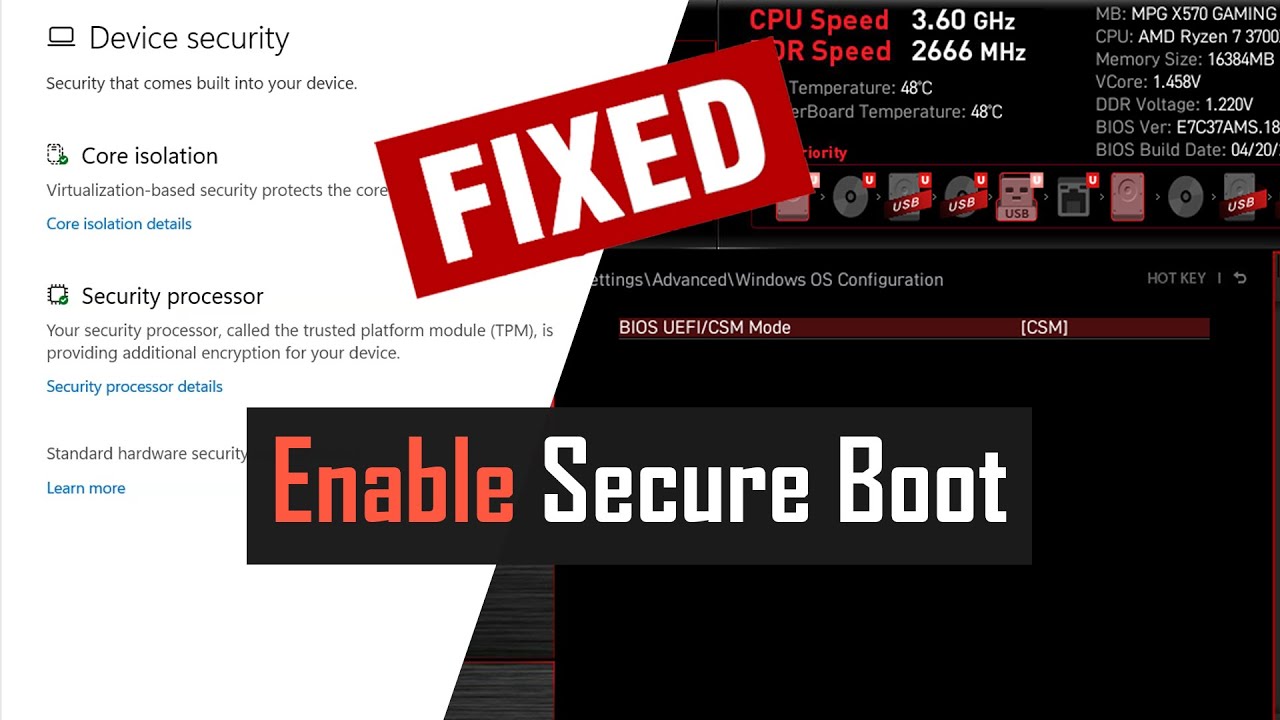
How To Enable Secure Boot?
To enable Secure Boot on your system, follow these steps:
- Access the system BIOS or UEFI settings by restarting your computer and pressing the designated key (e.g., F2 or Del) during startup.
- Navigate to the “Security” or “Boot” section in the BIOS/UEFI settings.
- Locate the “Secure Boot” option and set it to “Enabled”.
- Save the changes and exit the BIOS/UEFI settings.
- Restart your computer to apply the Secure Boot settings.
Enabling Secure Boot helps protect your system from unauthorized firmware, drivers, and operating systems. It ensures that only trusted software is allowed to run during the boot process, enhancing system security.
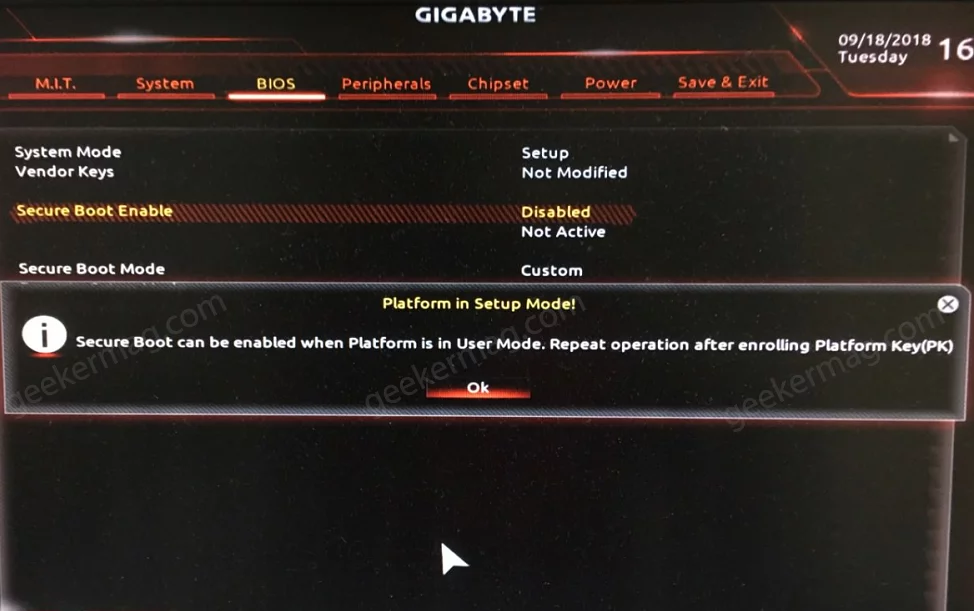
How To Fix Secure Boot Being Enabled In User Mode?
If your system is stuck in user mode and you are unable to access certain features, it could be due to secure boot being enabled. This section will discuss how to fix this issue and regain control of your system. We’ll cover various steps, including checking BIOS settings, updating BIOS, disabling secure boot, running anti-malware scans, and even reinstalling the operating system if necessary. By following these steps, you can troubleshoot and resolve the problem of secure boot being enabled in user mode.
1. Check BIOS Settings
To check the BIOS settings for secure boot, follow these steps:
- Start your computer and access the BIOS settings by pressing the designated key during the boot process (usually Del, F2, or F10).
- Navigate to the “Security” or “Boot” tab using the arrow keys.
- Look for an option related to secure boot, such as “Secure Boot” or “UEFI Boot”.
- Ensure the secure boot option is enabled or disabled as desired. If it is enabled and causing issues, consider disabling it.
- Save your changes and exit the BIOS settings. Your computer will restart.
2. Update BIOS
Updating the BIOS is a crucial step in enabling Secure Boot. To update your BIOS, follow these steps:
- Identify your computer’s motherboard model.
- Go to the manufacturer’s website and find the support page for your motherboard.
- Download the latest BIOS update for your specific motherboard model.
- Make sure your computer is connected to a stable power source.
- Run the BIOS update utility provided by the manufacturer.
- Follow the instructions on the screen to complete the BIOS update process.
- Restart your computer to apply the updated BIOS settings.
3. Disable Secure Boot
To disable Secure Boot, follow these steps:
- Access the BIOS settings on your computer. This can usually be done by pressing a specific key during startup, such as F2 or Delete.
- Once in the BIOS settings, navigate to the Secure Boot settings.
- Disable the Secure Boot option by following the instructions provided in your computer’s BIOS interface.
- Save the changes and exit the BIOS settings.
- After disabling Secure Boot, it is recommended to update your BIOS to the latest version to ensure compatibility and security.
- Lastly, run anti-malware scans on your computer to check for any potential threats.
By following these steps, you can successfully disable Secure Boot on your computer.
4. Run Anti-Malware Scans
To ensure the security of your system when it comes to Secure Boot, follow these steps to run anti-malware scans:
- Choose a reputable anti-malware software that offers real-time protection and scheduled scanning.
- Download and install the software on your computer.
- Update the anti-malware software to ensure it has the latest virus definitions and security patches.
- Perform a full system scan to detect and remove any malware or viruses.
- Review the scan results and take appropriate actions, such as quarantining or deleting infected files.
- Regularly schedule automatic scans to proactively protect your system against new threats.
By following these steps and running regular anti-malware scans, you can safeguard your system and prevent any potential security risks.
5. Reinstall Operating System
- Prioritize backing up your important files and data to ensure they are not lost during the reinstallation process.
- Obtain the installation media or download the latest version of the operating system you wish to reinstall.
- Insert the installation media (DVD or USB) into your computer and restart it.
- During the startup process, access the boot menu by pressing the designated key (e.g., F12) and selecting the installation media as the boot device.
- Follow the on-screen prompts to begin the reinstallation process.
- Choose the option to perform a clean installation, which will remove all existing files and applications on your system.
- Select your preferred installation settings, such as language, time zone, and keyboard layout.
- Specify the storage location for the operating system and complete the installation process.
- Once the installation is complete, reinstall any necessary drivers, applications, and updates.
- Restore your backed-up files and data to their original locations.
Why Can Secure Boot Be Enabled In User Mode?
Despite its intended purpose of providing added security measures, the secure boot can still be enabled while the system is in user mode. This raises concerns about the effectiveness of this feature and the potential risks it may pose. In this section, we will discuss the reasons why secure boot can be enabled in user mode, including common user errors, system vulnerabilities, and threats from malware and viruses. Understanding these factors can help users better protect their systems and prevent unauthorized access.
1. User Errors
User errors can inadvertently enable Secure Boot in user mode, potentially causing issues with booting the system. Here are some steps to fix this problem:
- Check BIOS settings: Access the BIOS menu and verify if Secure Boot is enabled in user mode.
- Update BIOS: Visit the manufacturer’s website, download the latest BIOS firmware, and update it to ensure compatibility with Secure Boot.
- Disable Secure Boot: Within the BIOS settings, locate the Secure Boot option and disable it to prevent user-mode activation.
- Run anti-malware scans: Perform thorough scans using reputable anti-malware software to identify and remove any potential malware or viruses.
- Reinstall operating system: If all else fails, reinstalling the operating system can resolve any lingering issues with Secure Boot being enabled in user mode.
2. System Vulnerabilities
System vulnerabilities pose a significant risk when it comes to secure boot. To minimize these vulnerabilities, it is important to take the following steps:
- Regularly update your operating system to ensure that any security vulnerabilities are patched.
- Install and regularly update antivirus software to protect against malware and viruses.
- Enable automatic updates for all software and firmware on your system to ensure that you have the latest security patches.
- Be cautious when downloading and installing software from untrusted sources, as this can introduce vulnerabilities.
- Regularly perform security scans to identify and address any vulnerabilities in your system.
By following these steps, you can reduce system vulnerabilities and enhance the security of your secure boot implementation.
3. Malware and Viruses
When it comes to Secure Boot, one important aspect to consider is its protection against malware and viruses. By enabling Secure Boot, only signed operating systems can boot, preventing any malware or viruses from starting up. By verifying the integrity of the operating system, Secure Boot helps prevent unauthorized modifications or malicious software from compromising the system. This is crucial in maintaining the security and stability of your device, safeguarding your data, and preventing potential damage caused by malware and viruses.
Frequently Asked Questions
1. What is a secure boot and why is it important?
Secure boot is a security feature that ensures only trusted and authorized software and operating systems can boot up on a computer. It helps protect against malware and unauthorized modifications to system files.
2. Can secure boot be enabled when the system is in user mode?
Yes, the secure boot can be enabled when the system is in user mode. However, this is not recommended as it can cause compatibility issues with some software and drivers.
3. How can I fix secure boot when it is enabled in user mode?
The best way to fix this issue is to disable secure boot, boot into the system, and then re-enable secure boot in the BIOS. This will ensure that the system is in a proper boot state and secure boot is enabled correctly.
4. Are there any risks associated with fixing secure boot when enabled in user mode?
Yes, there is a risk of compatibility issues with certain software and drivers when fixing secure boot while it is enabled in user mode. However, if done correctly, it should not cause any major problems.
5. Is it necessary to fix secure boot when it is enabled in user mode?
It is not necessary to fix the secure boot in this scenario if the system is functioning properly. However, it is recommended to correct any boot state issues to ensure the system is secure and stable.
6. Can I enable secure boot while the system is in user mode?
It is possible to enable secure boot while the system is in user mode, but it is not recommended. It is best to enable secure boot before the system enters user mode to avoid any potential compatibility issues.