Learn how to Upgrade Windows 7 to Windows 10 Free!
First things first!
Check your device specs to see if it’s good for Windows 10 upgrading. Processor, RAM, hard drive space, and graphics card should all fit what Microsoft requires. Check out the following table for the system requirements:
| Processor | 1 GHz or faster compatible processor |
| RAM | 1 GB (32-bit) or 2 GB (64-bit) |
| Hard drive space | 16 GB (32-bit) or 20 GB (64-bit) |
| Graphics card | DirectX 9 or later with WDDM driver |
Also, use Microsoft’s Upgrade Assistant to make sure there are no incompatible apps or drivers that could cause issues during the upgrade.
Backing up Data
Before upgrading to Windows 10, it’s essential to back up your system. Create a copy of all important files and folders on an external drive or cloud storage. Here’s the step-by-step guide:
- Connect the hard drive or log in to the cloud.
- Select the documents, images, videos, etc.
- Right-click and copy.
- Paste into the external folder or cloud storage.
- Verify they were copied.
- Eject the hard drive.
For future upgrades, set up a reliable backup plan. Automatic backups, backups after changes, and offline copies of documents should be sufficient. This way, one can upgrade without worrying about data loss.

Upgrading Windows 7 to Windows 10
1. Downloading Windows 10 Upgrade Assistant
Upgrading your Windows 7 to Windows 10? Download Microsoft’s ‘Windows 10 Upgrade Assistant’ tool. It’ll help you upgrade your system from older Windows versions! Here’s a guide on how:
| Go to the Microsoft website. |
| Click ‘Download now’. |
| Once it’s downloaded, click run. |
| If prompted, click ‘Yes’. |
| The utility will check if your system is compatible with Windows 10. |
| It’ll then start the download process. |
| Follow the steps guide provided by the software and complete the installation. |
Downloading the assistant also helps identify issues that could arise during installation. Upgrade your Windows 7 to Windows 10 safely with these steps and the ‘Windows 10 Upgrade Assistant’ tool!
2. Running Windows 10 Upgrade Assistant
Want to upgrade from Windows 7 to 10? Start with the Windows 10 Upgrade Assistant tool. It’ll scan your device and alert you to any compatibility issues before the upgrading process begins. Here’s what to do:
- Go to Microsoft’s website and download the Windows 10 installation media creation tool.
- Launch the tool. On the initial screen, select the ‘Upgrade this PC now’ option.
- The tool will take a few minutes to check compatibility. If there are any issues, follow instructions to resolve them or call an expert.
- Once all compatibility issues are cleared, click ‘Next’ and follow the on-screen instructions.
- The system will restart several times to properly configure new settings after the upgrade.
Microsoft’s Media Creation Tool is the recommended way to upgrade from Windows 7 to 10 as it helps prevent compatibility problems.
3. Selecting the Upgrade Option
It’s a must to upgrade from Windows 7 to 10. To do this, you have to pick an upgrade that fits your needs.
1. Visit the Microsoft site and download the Windows 10 installer.
2. You can either get the “Upgrade this computer now” option or make a bootable USB or DVD drive with the installer and select “Custom installation”.
3. If you pick “Upgrade this computer now”, all your files and settings will remain, but if you go for “Custom installation”, you can do a clean install and clear existing data.
Remember that the upgrade process may take a while, so create a backup of your important data before starting. Now that we’ve gone over Selecting Upgrade Option, let’s move on to other important info.
4. Accepting License Agreement
To progress with the Windows 10 upgrade, it is essential to accept the software’s license agreement. This signifies that the user agrees to comply with the terms and conditions mentioned in the agreement before installing the software. The license agreement is a legal document that defines how Windows 10 may be used on the PC.
It is important to know that Microsoft implements measures to protect user privacy when using its products and services. Upon accepting the license agreement, users permit automatic updates which enhance security features and protect against potential risks.
Furthermore, once the license agreement is accepted, the user is obligated to follow its terms during their use of Windows 10. Thus, they must read through all clauses carefully prior to agreeing. If any terms are disagreeable, the installation should be cancelled.
Finally, it is necessary to check if the PC has enough storage for the Windows 10 upgrade.
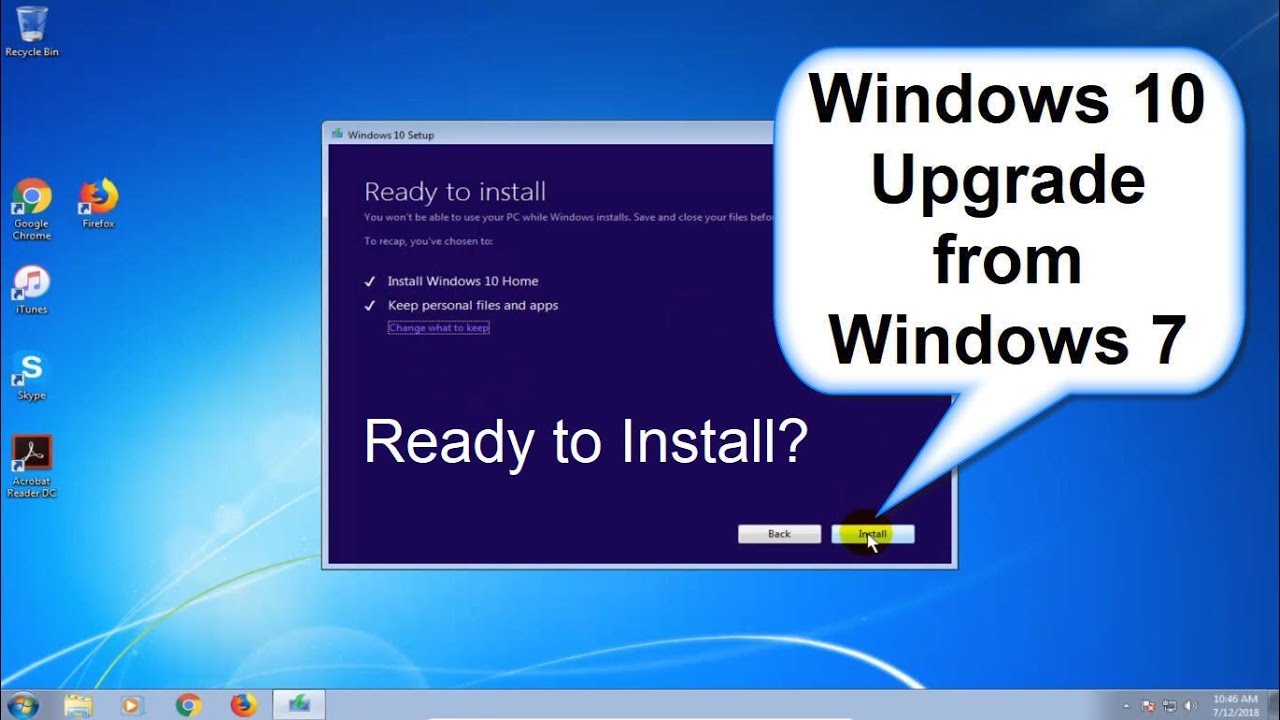
5. Starting the Upgrade Process
To update Windows 7 to 10, here’s a 6-step guide:
- Check if your system meets the minimum requirements.
- Backup data on an external HDD or cloud storage.
- Download Windows 10 installation file from Microsoft’s website onto a USB/DVD.
- Insert USB/DVD and run setup.exe.
- Follow Microsoft’s instructions to install Windows 10.
- Wait for the upgrade to finish, which may take minutes to hours.
For a smooth installation, it’s important to have a stable network connection. Close all running programs before initiating upgrade. It’s easy to update from 7 to 10 if you prepare in advance!
6. Rebooting the System
After upgrading to Windows 10, restarting your system is essential. This ensures changes are applied and any issues during installation are sorted.
To reboot, click the Start menu and select the power icon. Choose “Restart” from the pop-up and wait for your computer to shut down and start again.
Avoid interrupting or shutting down manually as it could lead to data loss or file corruption. Let Windows finish the process and follow any instructions during start-up.
Finally, check all hardware components like printers, scanners and speakers are connected and operational after rebooting to use the new OS fully.
7. Setting Up Windows 10
Wanna get Windows 10? Here’s what you must know. Follow these steps to get the latest Microsoft OS and enjoy its fresh features and improved performance.
| Step | Description |
|---|---|
| 1 | Check Compatibility: Ensure your device complies with the minimum specs for Windows 10; such as processor speed, storage and RAM. |
| 2 | Backup Data: Before the upgrade, make a backup of vital data and documents. In case of data loss during the install, you’ll be safe! |
| 3 | Download and Install: Get the newest version of Windows 10 from Microsoft’s website or use their media creation tool to upgrade your existing OS without losing your stuff. |
| 4 | Customize Settings: After installation, set your display resolution, language preferences and device security options. |
Be sure to have an internet connection for any updates after installation. With these easy steps, you can get Windows 10 running on your device with minimum stress and maximize its potential.
8. Activating Windows 10
Once you’ve installed Windows 10, the next step is to activate it. Activating Windows 10 is essential so that you can unlock all its features and get security updates. Here’s an easy guide:
- Click ‘Start’ and then select ‘Settings’.
- In settings, go to ‘Update & Security’.
- On the left-hand side menu, select ‘Activation’.
- Hit the ‘Activate’ button.
- Follow the instructions to complete the activation process.
It’s important to know that you need a valid product key to activate Windows 10. If you don’t have one, you can buy it from Microsoft or authorized retailers.
In certain cases, your device might already be activated with a digital license. This usually happens if you upgraded from a genuine copy of Windows 7 or 8.1. In these situations, make sure your device has an active internet connection and Windows will activate itself automatically.
By following these steps, you can activate your Windows 10 and enjoy its features without any restrictions.
Troubleshooting Common Upgrade Issues
When transitioning from Windows 7 to 10, users may come across a few issues. Here are some tips to make the upgrade easier:
- Make sure software & drivers are up-to-date.
- Double-check if hardware, software & devices are compatible with Windows 10.
- Delete any files & apps you no longer need to free up storage.
It’s vital to back up important data before starting. Following these steps & preparing in advance can help prevent any hassles when upgrading from Windows 7 to 10.
Conclusion: Windows 7 to Windows 10 Upgrade Tools & Guide
Upgrade your Windows 7 to Windows 10 for free, using the steps above. It’ll take time and effort, but it pays off! You’ll get access to fresh features and security updates. Plus, improved computer performance.
Before getting started, back up your significant files too prevent any data loss.